
Create Custom Groups
Starting in Strategy (August 2026), you can create custom groups in Library.
Custom groups are a convenient and powerful way to create aggregations or sets of attribute elements in a way that doesn’t exist in the data source; for instance, a new region combining states. Custom groups also provide a way to create automatic groups or bands based on a qualification. Each set in a custom group can have its own filtering, which might be based on other elements, like revenue range and product type for a segmented analysis of high selling electronics.
Custom groups are flexible because you do not have to know much about your data to create the filter qualifications that define each custom group element.
Prerequisites
You must have the Web Use Custom Group Editor privilege.
- In Library, click Create New
 , point to Objects, then select Custom Group.
To edit an existing custom group instead, find the custom group and double-click it. You can search for the custom group or navigate to it using browse folders.
-
If you are connected to multiple projects, select the project to create the custom group in and click OK.
-
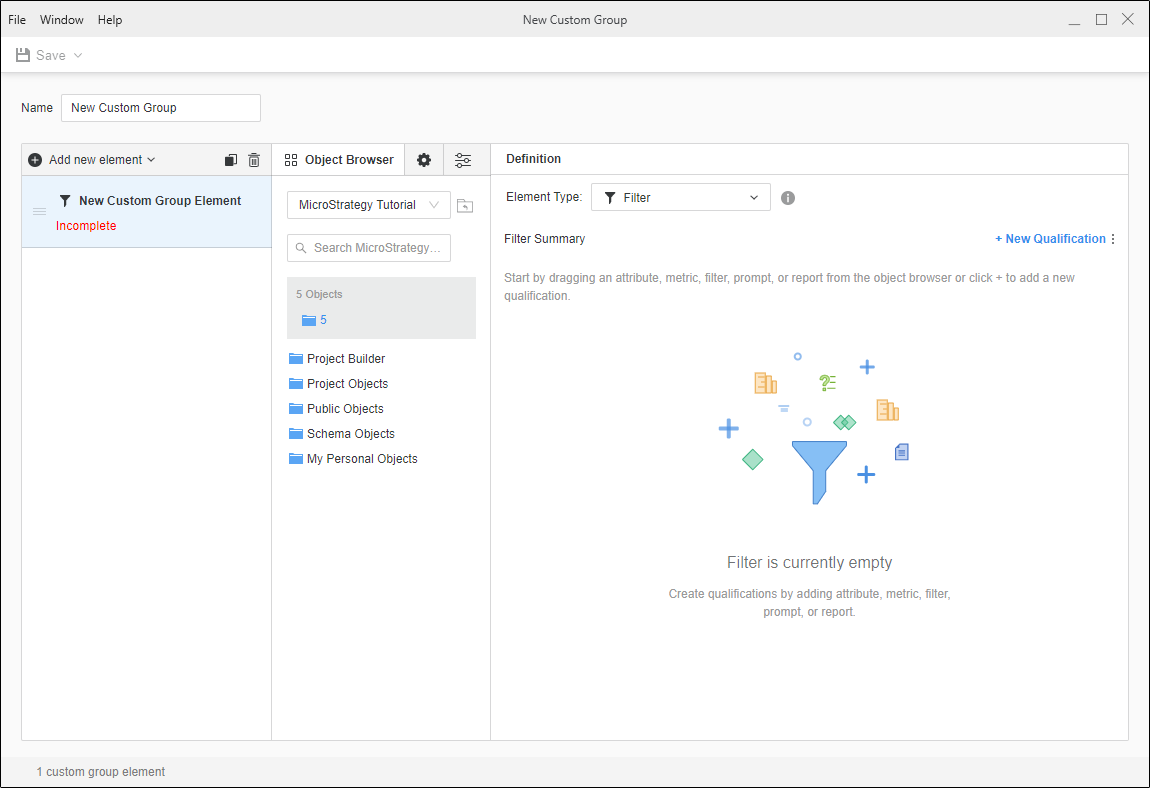
To add a custom group element, click Add new element.
-
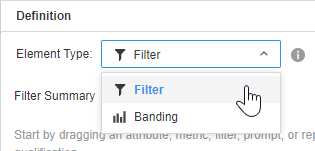
Complete the definition of the custom group element in Element Type.
-
Click here to add a filter element type.
-
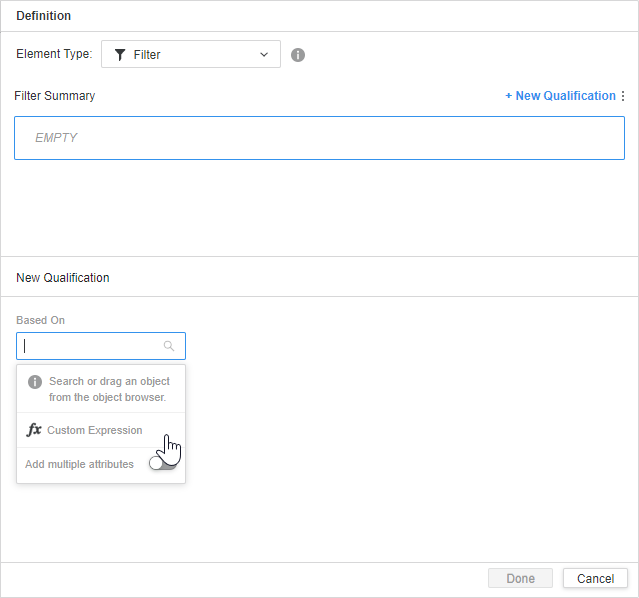
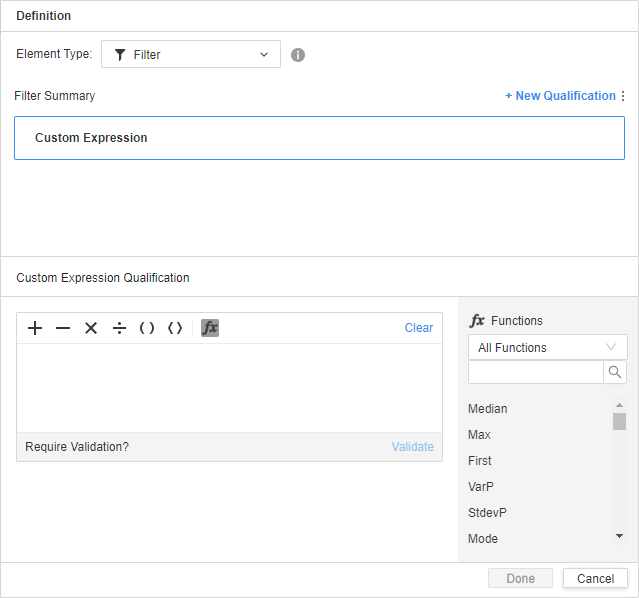
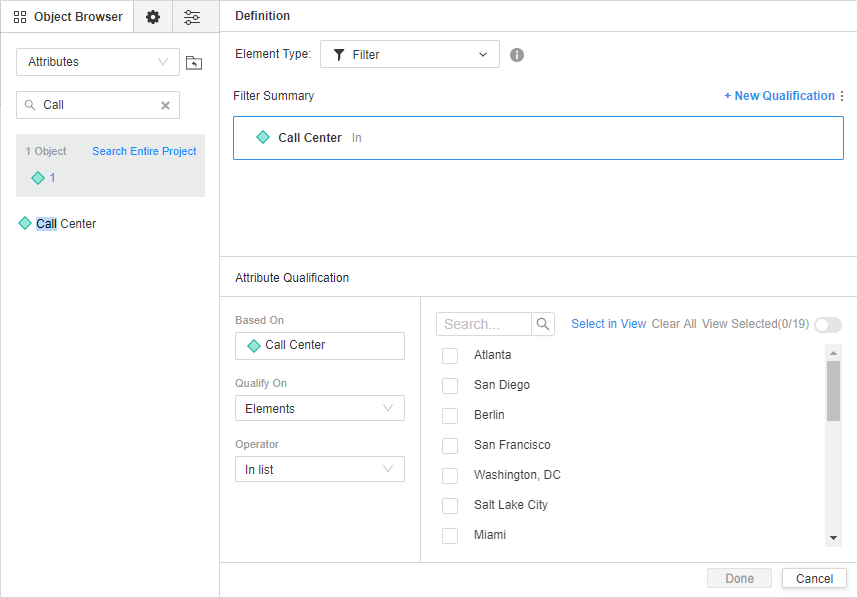
Define a qualification using a custom expression or use the Search box to browse for an attribute.
-
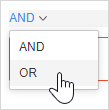
If necessary, click New Qualification to combine filters and then change operators.
-
Add additional filters as necessary.
-
-
Click here to add a banding element type.
-
Select attribute(s) for the distribution of elements in Distribute elements of attributes in band.
-
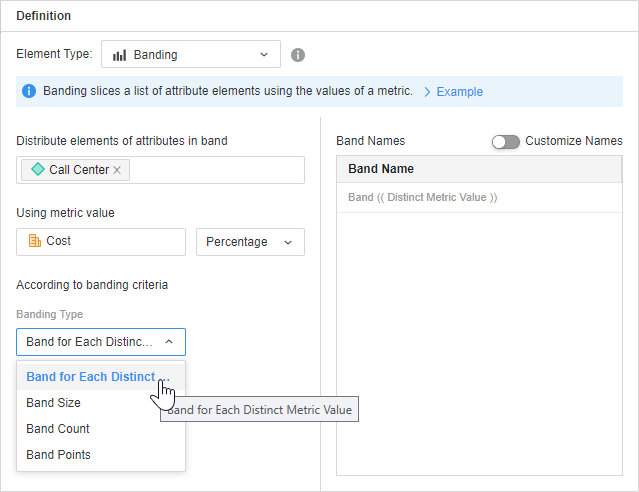
Choose a metric and select Percentage, Rank, or Value banding.
-
Choose a Banding Type.
-
Set the corresponding criteria.
-
-
Repeat for as many custom group elements as necessary. To duplicate a custom group element to use as a base for another element, select the element and click Copy
 .
.
-
To delete an element, right-click it and choose Delete. You can multi-select elements for deletion.
-
The custom group elements display on the report in the order shown on the left. To rearrange the order, drag and drop elements into the new order.
-
You can:
Save the Custom Group
-
Click Save.
-
Once you have created a custom group, you can add it to a report, document, or dashboard to analyze your data.
Define How to Display the Elements
By default, only the element name of a custom group element displays, but you can change it.
For example, the Regional Group custom group organizes call centers into East Coast, South, and West Coast elements. The custom group is used on a report.
-
By default, only the element name displays, so the report contains a Regional Group column with the element names. An East Coast row, a South row, and a West Coast row display.
-
If only the individual items display, the report contains a Regional Group column with the element names and a second column for the Call Centers. For the South element, separate rows for Atlanta, New Orleans, and Memphis display. In other words, the element name is included on each item's row rather than as a separate row.
-
If both the element name and items display, the report contains a Regional Group column with the element names and a second column for the Call Centers. For the South element, a row displays for the West Coast, as well as separate rows for Atlanta, New Orleans, and Memphis.
Each element of the custom group can use a different display option. In the report example below:
-
The East Coast element displays the element name only.
-
The South element displays only the individual items.
-
The West Coast element displays both.
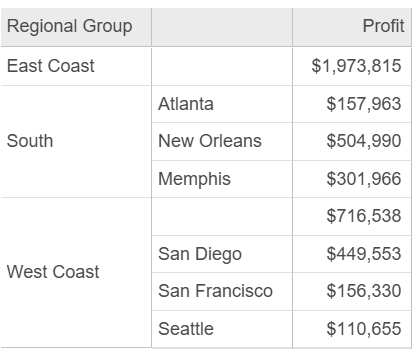
Use this flexibility in display to show both summary and detailed views of data on the same report.
-
In the Custom Group Editor, click Options
 .
. -
Click a Display option:
-
Show only the element name
-
Show only the individual items within the element
-
Show both and expand the individual items if possible
-
-
Save the custom group.
Define the Custom Group Interaction with the Report Filter
The VLDB property for custom groups allows you to define how the custom group interacts with the report filter.
-
In the Custom Group Editor, click Advanced Properties.
- Custom Group Interaction with Report Filter: Choose one of the following options:
Use Inherited Value - Default Level: Inherit the value.
No interaction - static custom group: Report filter qualifications are not applied to custom groups that use metric qualifications or banding qualifications. Filtering is only applied after the custom group has been evaluated.
Apply report filter to custom group: Report filter qualifications are applied to custom groups and are used to determine the values for each custom group element.
Apply report filter to custom group, but ignore related elements from the report filter: Report filter qualifications that do not qualify on attribute elements that are used to define the custom group elements are applied to custom groups. These filter qualifications are used to determine the values for each custom group element. For example, a report filter that qualifies on the Customer attribute is not applied to a custom group that also uses the Customer attribute to define its custom group elements.
- Close the Advanced Properties pane.
-
Click Save to save the changes to the custom group.
-
Disable Hierarchical Display
By default, custom group elements display hierarchically, that is, in a column separate from the custom group items, as shown below:
If you disable hierarchical display, the custom group elements and items display in a single column, that is, in flat display. The image below is the same report as above, displayed with the hierarchy:
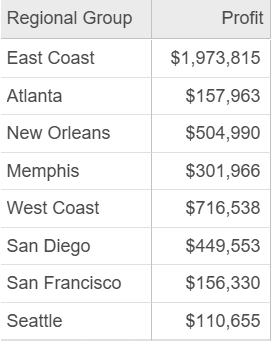
-
In the Custom Group Editor, click Advanced Properties.
-
Toggle off Enable Hierarchical Display.
- Close the Advanced Properties pane.
-
Click Save to save the changes to the custom group.
Include Custom Group in Report Grand Total
By default, subtotal display is disabled for the custom group. This means that a report that uses the custom group does not display grand totals because the custom group is not included in the grand total. This eliminates double-counting.
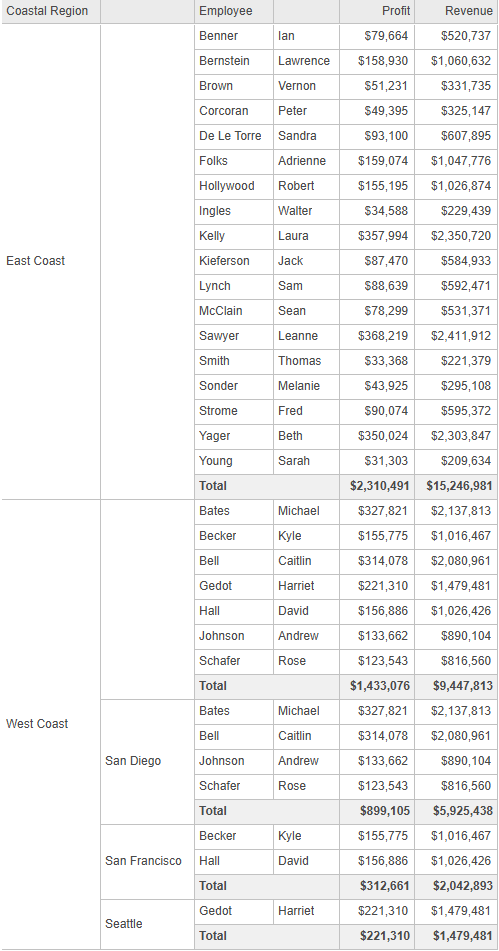
For example, a report contains the Coastal Region custom group, which is based on the Call Center attribute, and the Employee attribute. With subtotals enabled, the report displays subtotals for each custom group element and a grand total.
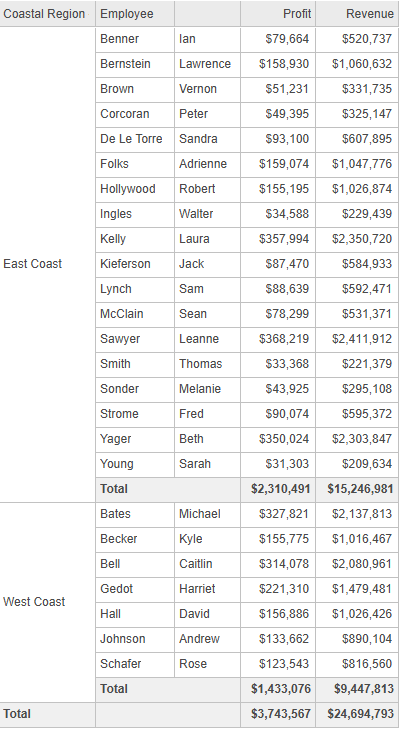
If an element displays the element name and individual items, enabling subtotals can create double-counting. In this version of the same report:
-
The East Coast element of Coastal Region shows only the element name. The subtotal matches the previous report.
-
The West Coast element displays next, with a total profit of $1,433,076, matching the previous report.
-
The West Coast element then displays each call center that comprises the element.
-
Because the West Coast element includes each employee twice, the grand total double-counts them. The report's grand total is $5,176,643, compared to the previous report's $3,743,567.
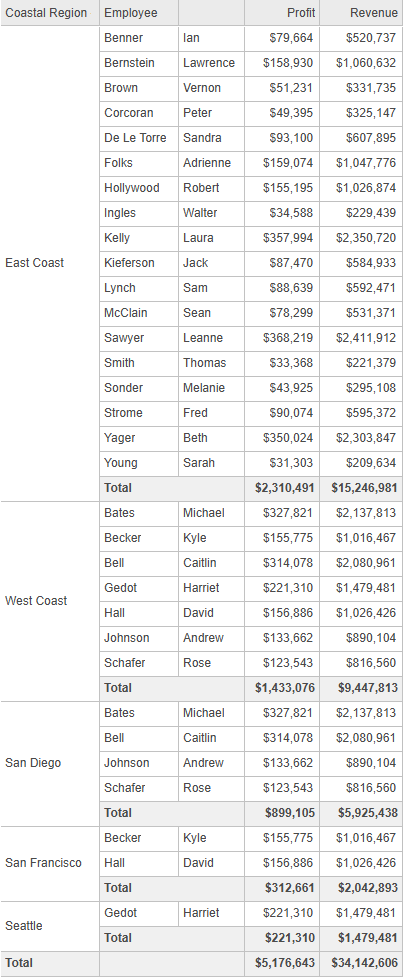
To fix this issue, disable the subtotal display in this scenario.
-
The East Coast element remains the same.
-
The West Coast element still displays the element and then the call centers that comprise it, but in a hierarchical view.
-
With the custom group subtotal disabled, grand totals are not included so each West Coast employee is not double-counted (once from the West Coast subtotal and once from their Call Center subtotal).
-
In the Custom Group Editor, click Advanced Properties.
- By default, subtotals are disabled. To enable them, toggle on Enable Subtotals Display.
- Close the Advanced Properties pane.
-
Click Save to save the changes to the custom group.
-
Select the Display Position of the Element Header
-
In the Custom Group Editor, click Advanced Properties.
- From the Element Header Display Position drop-down list, select the position:
- Above Child Elements: For a custom group that groups states into regions, the states are the child elements. Each region, with its total, displays as a row above the states.
- Below Child Elements: In the same scenario as above, rows of a region's states display, followed by the region and total row.
- Close the Advanced Properties pane.
-
Click Save to save the changes to the custom group.
-