Strategy One
Display a Status Message for an Application
Starting in Strategy One (May 2026), you can define a start and end time for a status message to display in an application.
Administrators need to be able to communicate important information to Library business users in a visible yet non-disruptive way. For example, you may need to display system availability messages such as announcing an upcoming maintenance window, indicate the last time that the application was updated, or other administrative messages.
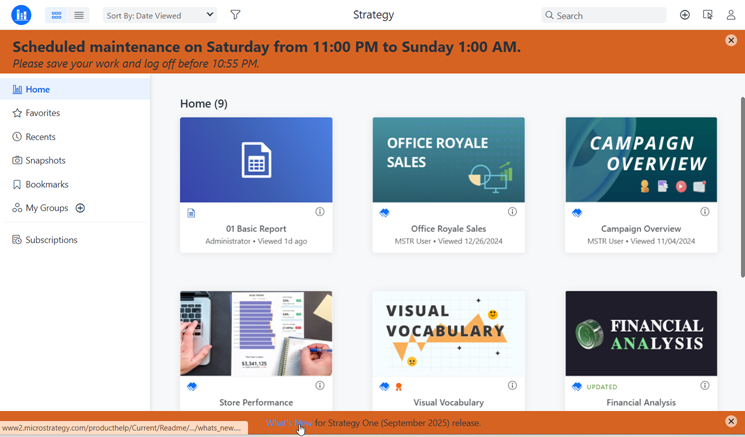
For example, this application shows messages in both the header and footer. The footer contains a link to the release notes. Users can close the header or footer separately by clicking its Close button (X). You can disable the close message icon if you want the message to remain onscreen.
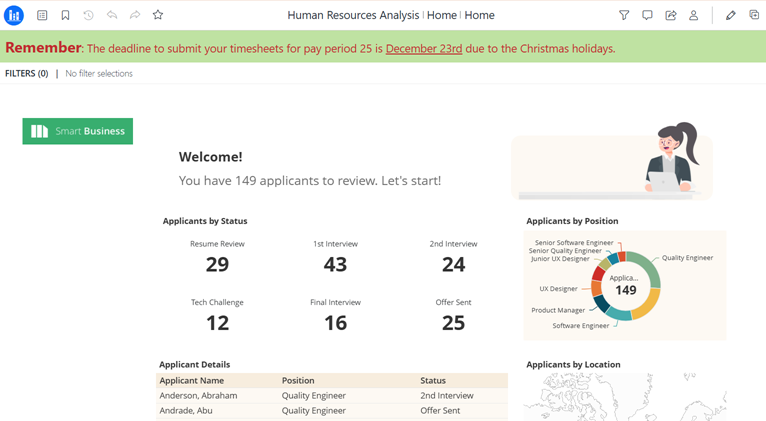
In this Human Resources application, only a header displays. It displays on every screen in Library, not just the home screen. The image below shows the header on a dashboard.
Create a Status Message
- Open the Workstation window with the Navigation pane in smart mode.
-
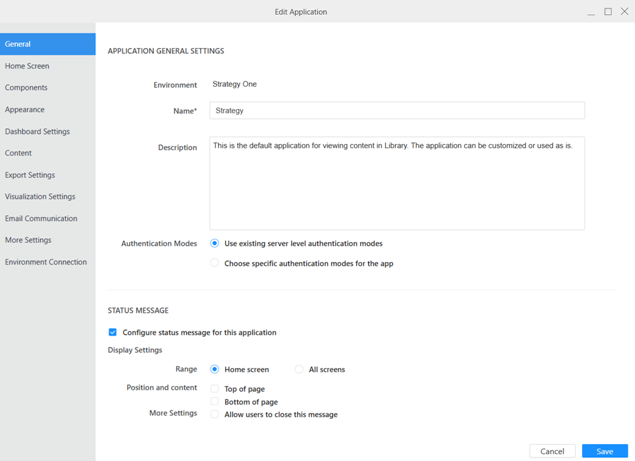
In the Navigation pane, click Applications.
-
In the left pane, click General.
-
Select the Configure Status Message for the Application check box, which expands the Status Message area.
-
-
Expand the timezone drop-down list and choose a timezone for the schedule to follow.
-
Expand the first date field and choose a start date for the message to display.
-
Expand the first time field and choose a start time for the message to display.
-
Expand the second date field and choose an end date for the message to display.
-
Expand the second time field and choose an end time for the message to display.
-
-
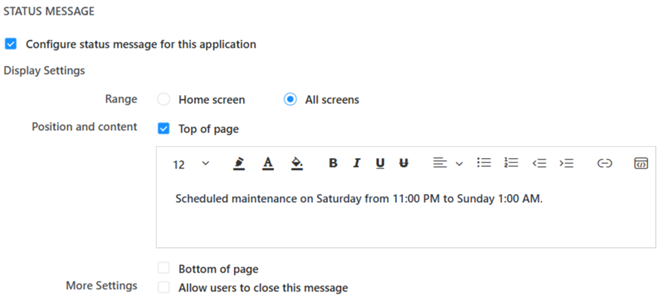
In the Range area, select whether to display the status message on the Home Screen or All Screens. The home screen is the initial page of the application, set in Application Home Screen.
Display a Header
You can display a message in the header or in the footer, or you can display a separate message in the header and in the footer.
-
To display a message on the top of the screen, select the Top of Page check box. An editor displays.
-
Type and format the content of your message.
The character limit is 5000.
-
You can switch to an HTML editor by clicking HTML Editor
 in the format toolbar. To switch back, click HTML Editor again.
 -
When you are in the HTML Editor, the icon displays in blue rather than black.
-
-
To add a link:
-
In the format toolbar, click Insert Link
 in the toolbar.
 -
In the Insert Link dialog box, type the Text to Display.
-
Type or copy and paste the URL in the Address box.
-
Click OK.
-
-
To add an image:
-
In the format toolbar, click HTML Editor
. -
Type the following code in the location to display the image, replacing Image Location and ##:
<p> <img src="https://Image Location"
style="width:##px;height:##px">
-
Switch back to the preview view by clicking HTML Editor
again.
Display a Footer
You can display a message in the header or in the footer, or you can display a separate message in the header and in the footer.
-
-
To display a message on the bottom of the screen, select the Bottom of Page check box. An editor displays.

-
As with the header, type and format the content of your message. You can switch to the HTML editor, add a link, and add an image.
The character limit is 5000.
Allow Users to Close the Message
-
By default, users can close the message. If you want the message to remain onscreen, clear the Allow Users to Close this Message check box.
When users can close the message, the close button (X) displays in the upper right of the message.
Finish Creating Your Application
-
Continue to another element or, if you have completed customizing your application, click Save to return to the Applications list.
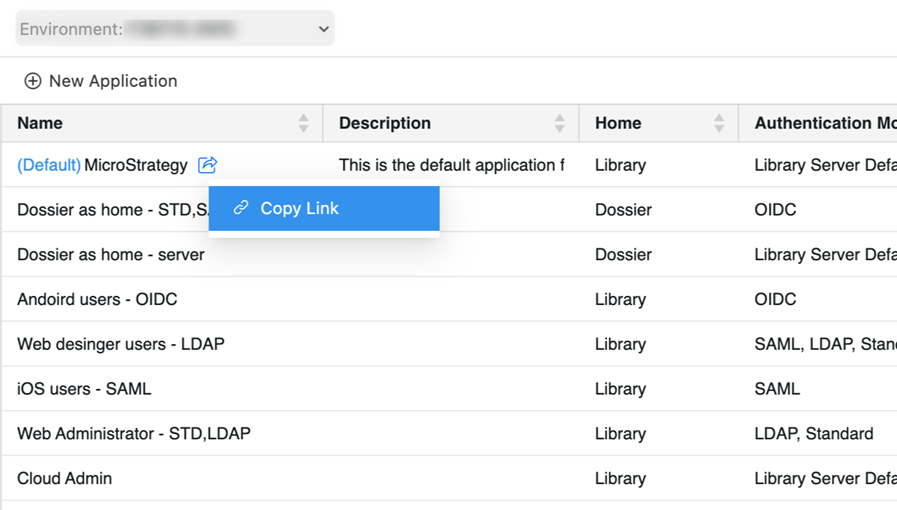
View the Status Message
- In the Navigation pane, click Applications.
- Right-click the application and click Copy Link.
- Paste the link in your web browser or configure Library Mobile to connect to your environment and open the application.