
Add a Trusted Environment
Starting in Strategy (July 2026), Workstation supports trusted connections between Strategy environments. Administrators now have a secure method to manage cross-environment workflows directly in Workstation. Administrators can connect development, test, and production environments by establishing explicit trust between them. Once an environment is trusted, users can promote content through migrations, reverse migrated packages when needed, and duplicate projects across environments. Creating trusted environments makes it easier to manage the development life cycle across connected environments, with clearer governance.
Secure connections are required for Mosaic schema objects and data workflows.
Establish a two-way trust between environment pairs by manually configuring both environments.
Trusted environments is set at the environment level; it applies to all users.
Regular users can add user environments and set them to be trusted (using step 3 below). Regular users see the trusted icon only on their user environments they add as trusted environments.
To access the Trusted Environments tab, you must have the Administer Environment privilege.
You can add an environment with a version earlier than Strategy (July 2026) by enabling CORS on the environments users want to connect to. These environments do not show in the Trusted Environment tab unless you manually trust them. For steps to enable CORS, see Configure Library Server for Embedding.
Add a Trusted Environment
-
Open the Workstation page.
-
To trust an existing environment, do one of the following:
-
Click the Account
 icon on the top right. In the list of Environments, hover your cursor over the environment name to trust. Click the Untrusted Environment icon
  that displays.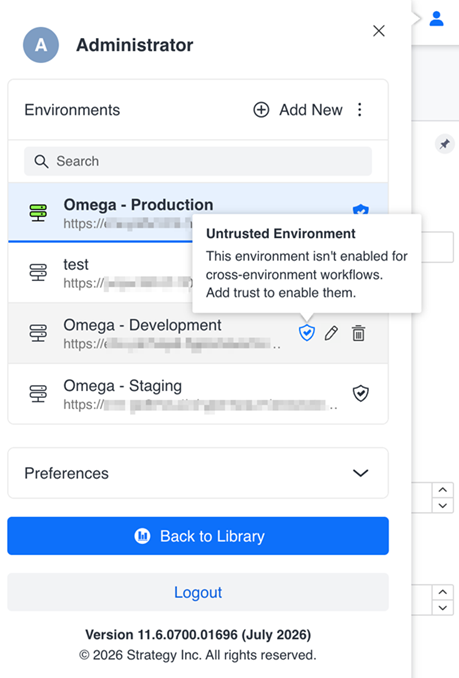
-
In the Navigation pane, click Environment Settings. Click the Trusted Environments tab.
The Trusted Environments tab of the Properties page opens, with the environment's URL displayed.
-
-
To trust an environment while adding it, complete the following steps:
-
Click the Account
icon on the top right. -
On the Account window, in the Environments area, click Add New and select Trusted Environments.
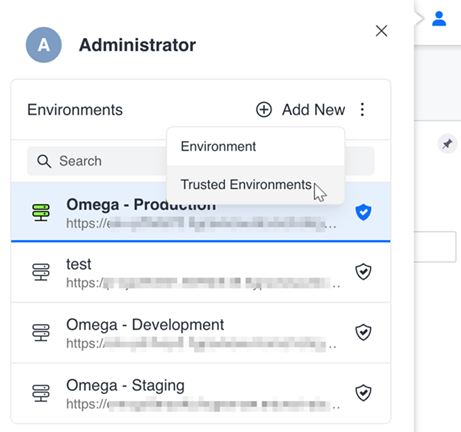
The Trusted Environments tab of the Properties page opens.
-
-
If the environment URL is not already filled out, select an existing environment or type the URL manually.
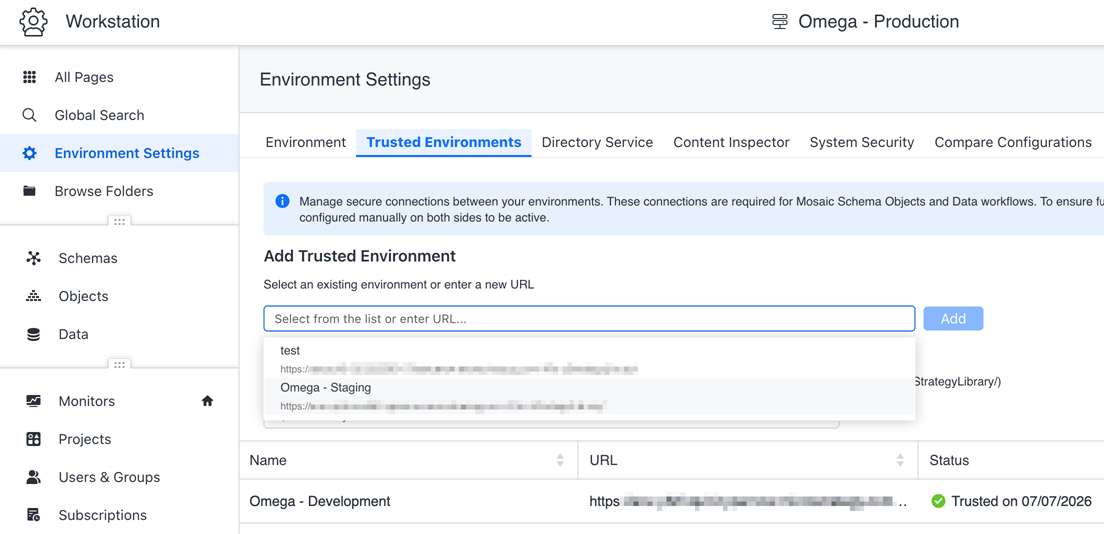
-
Click Add.
-
The administrator is redirected to the newly added trusted environment to complete mutual trust establishment. Click Trust to accept the trust request to establish the trusted connection. Once the connection is trusted, users can perform connected workflows such as object promotion between environments.
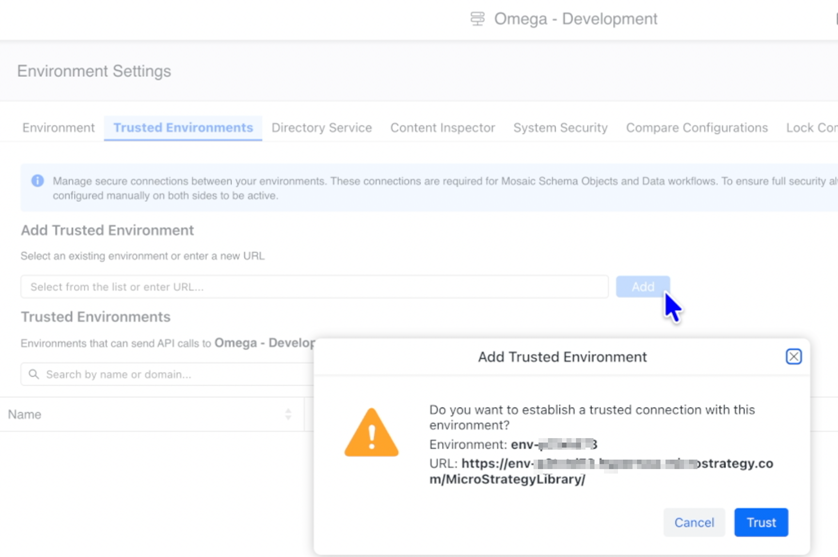
- Server-side verification of the Library URL confirms that it's a viable environment. If this verification fails because the environment is not accessible (such as being offline or behind a firewall), a message displays. Confirm whether you still want to trust the unverified environment.
You do not have to restart Library, but it can take a few minutes to propagate.
The trusted environment may not available to be selected in some places, due to missing privileges, missing feature flags, no active session, and so on.
Related Video
See the following video on setting up a trust environment: