Strategy One
Create and Edit Data Sources
When you create a new data source, the connections automatically contain the full connectivity information. When creating a new data source for a particular gateway, all relevant parameters specific to that gateway appear in the Database Connection dialog, providing in-product guidance without the need to read driver documentation.
You can duplicate an existing data source to efficiently create similar connections. All relevant settings are copied and can be edited. Right-click the data source and select Duplicate. Edit and save the copy.
Create a Data Source
-
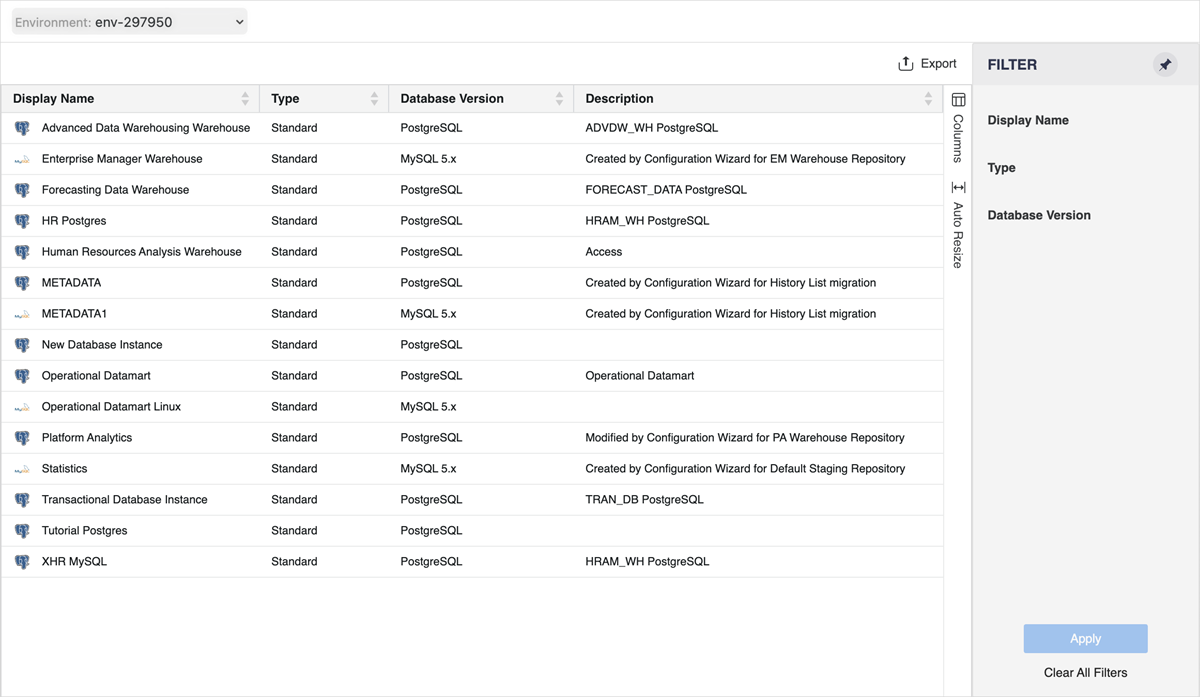
In the Navigation pane, click Data Sources.
-
Click Add New Data Source.
-
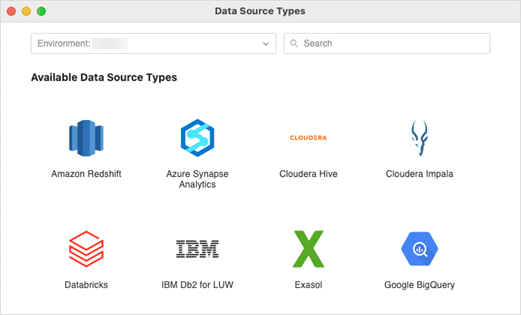
Choose the gateway (database type) to use for the connection.
-
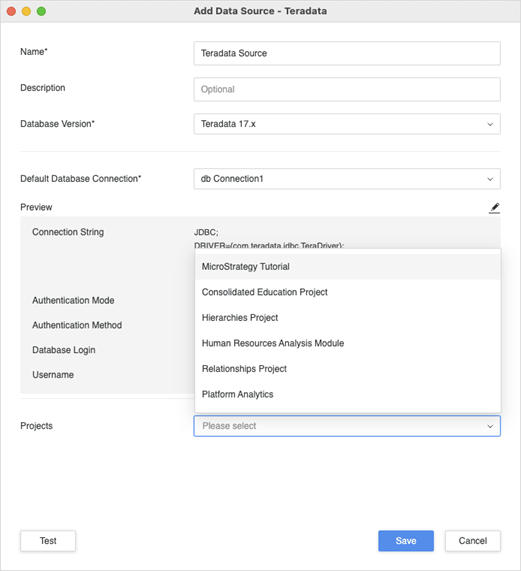
Name the data source, choose the Database Version, and select a Default Database Connection or create a new one.
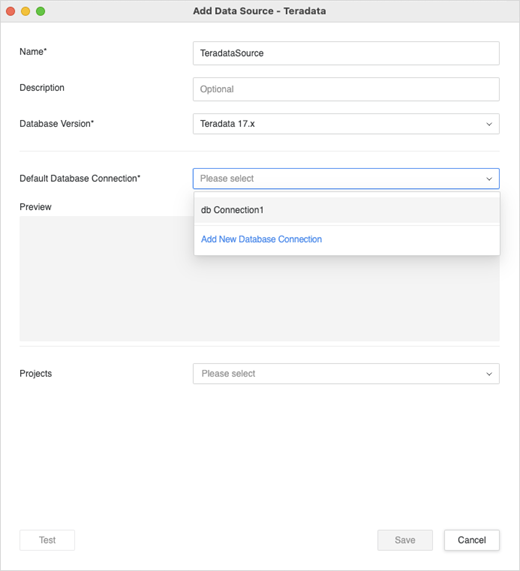
-
If you are creating a new database connection, enter the necessary information.
Basic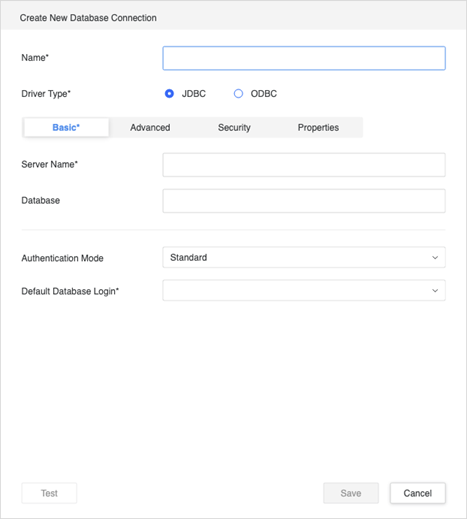
If you choose a Standard Authentication Mode, you must choose a login or create a new one.

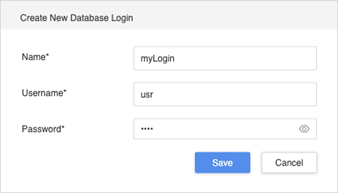
If you choose to create a new login, enter your database login information.
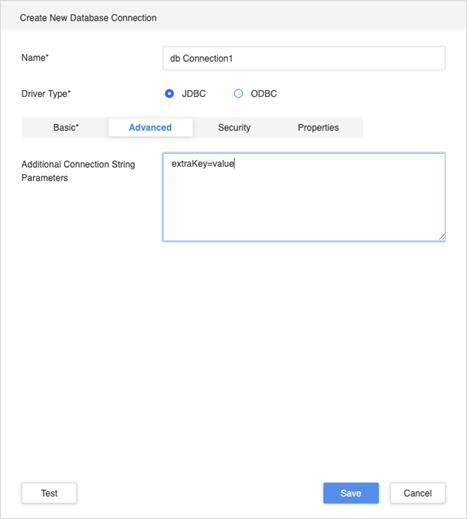
 Advanced
Include any additional parameters to add to the connection string. For example, you can use
UseNativeQuery=1;for Cloudera gateways.Remember to use the key=value format. If more than one parameter is specified, use a separator specific to that gateway. The separator is usually a semicolon (:) or ampersand (&).
If you are unsure which separator to use, try hitting Enter to create a new line. This should format the first line and add the appropriate separator at the end.
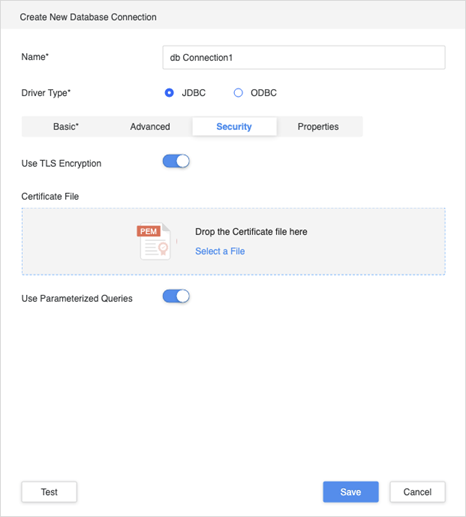
 Security
Specify any additional security settings. You can upload TLS/SSL certificates here, which may be required for some gateways.
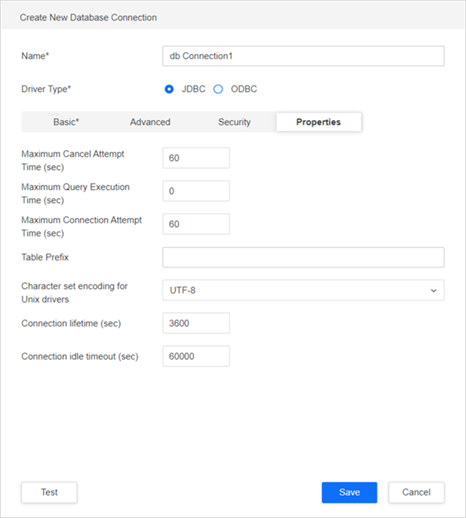
 Properties
After completing all fields, click Test and Save your connection.
-
Select the Projects to which the data source is assigned and can be accessed.
-
Test the connection and click Save.
Edit a Data Source
-
In the Navigation pane, click Data Sources.
-
-
Right-click a data source and choose Edit.
Currently, only Standard data sources can be edited. These are the sources created in the Data Source dialog. Data Import sources are user-defined data sources with managed objects that offer limited functionality. Script is a class of data sources linked to scripts.
If you change the Database Version or Default Database Connection, a schema reload is performed automatically when you click Save.
-
After you make your changes, click Save.
Open the Workstation page.
Edit a Database Connection
-
In the Navigation pane, click Data Sources.
-
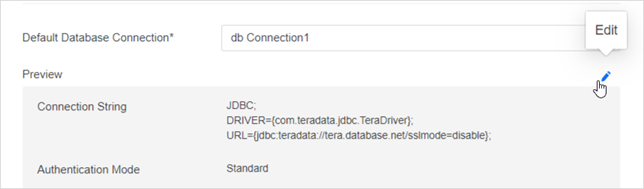
Right-click a data source and choose Edit.
-
In the Preview area, click Edit
 .
. 
Open the Workstation page.